Quantcast
Channel: The Vintique Object
Viewing all 102 articles
Browse latest View live

Our Vintage Kitchen

$
0
0

Here are a few pics of the kitchen in our new house.  Though the layout is awkward, and there is very little counter space and storage, this is still my favorite room. I haven't done a thing to it since we bought it, other than decorate and purchase a fridge.

This little built in is a life-saver in terms of storage.  The skinny little pantry on the right holds most of our dry food and canned goods.  The microwave (are they not like the TV of the kitchen -- something we always want to hide?) sits in that spot because it had the only outlet at counter height in the entire kitchen when we moved in.  We have since had an electrician add two more outlets.

There's plenty of light in here, but I still think this wall is begging for a huge mirror.  I'd want to find one big enough to cover the opening for the old stove vent.  Perhaps that's a job for Ikea.   I had originally considered a wall of open shelves here, but I think I have plans for those elsewhere, as you will see in a minute.  (The ledge on which the glasses sit came with the house.)

 This strange little cupboard built into the wall is a California Cooler.  It is basically the equivalent of an icebox and was used in the days before refrigeration.  Also a topic for another post.  Right now I'm using it for baking pans and the like, but you can see there's a ton of unused space near the top.  Need to add shelves stat!


This little nook next to the dining room door proved to be a perfect spot to hang pots and pans -- since there was nowhere else to put them. 


Here is the kids corner.  My girls sit at the little table for crafts and to eat their breakfast and lunch.  This little nook has given me so many fits in terms of what to put here.  But that's a topic for a future post.  I keep changing my mind, but I'm currently considering built-in shelves floor to ceiling -- a project I think I can do myself.  For now, the ticking stripe curtains are hiding cubbies full of art supplies for my girls.  That shelf near the top was there when we moved in and it looks fairly easy to replicate.  On top of the shelf, the left basket holds picnic supplies while the right one holds extra paper towels.  


This is the second place I've lived in with commercial grade vinyl tiles -- the kind you might see in a grocery store or school.  I love them!  They look clean, even if they are dirty and they are SO durable.   The pattern in which they were laid would probably not be my first choice, but they kind of lead the eye diagonally across the room, making it feel bigger.

The fridge.  Oh boy, did I agonize over that choice since I never saw it in person before ordering.  I insisted on getting something counter-depth so it wouldn't stick out beyond that wall next to the garage door.  It is extra tall, and with only 13.8 cubic feet of storage, the interior is small.  But the layout is so efficient we can fit a week's worth of food for a family of four.  Again, perhaps a post for another day if folks want to know more.  Anyway, it has a sleek, white glossy finish, rather than pebbled, and I dig those handles.  Next to the fridge is the Ikea shelf from our previous kitchen to add more storage.

Our island is actually the portable dishwasher, since the kitchen came without one.  I added a remnant piece of butcher block cut larger than the top and mounted a small towel bar to the underside to hide the power and sink hook-ups, which feed into that slot on the back.  It's funny, we've had so many visitors comment on our small island, and they are so surprised to find out it's actually a dishwasher.  That was my goal!  I basically do 100% of our food prep on that little butcher block rectangle. 

The counters, oy.  I dislike the tiled counters, but at least they are white.   What I do love are the porcelain undermount sink, the wall-mounted faucet, and the original subway tiles on the backsplash. 


So there it is.  I have lots of topics for future posts here.  We won't be doing any kind of remodel to this kitchen in the near future.  Our 1925 house has some dry rot issues to be dealt with and the frame needs to be bolted to the foundation since we live in earthquake country.  So any extra funds are going to that for now.  In the meantime, I do want to come up with some clever, inexpensive solutions to make it more workable.  Any ideas are welcome! 


Extending Counter Space

$
0
0
http://lascositasdebeacheau.blogspot.com.es/search?updated-max=2013-07-10T08:42:00%2B02:00&max-results=40&start=12&by-date=false

How clever of these homeowners to use a small amount of space in order add more counter -- either to eat at or work on. 

source

http://studiokarin.blogspot.no/2012/08/ett-dromhem-i-modern-vintage-mix.html

http://www.sacramentostreet.com/category/im-loving/page/3/

http://media-cache-ec0.pinimg.com/originals/34/69/21/3469219e72d7338d6fdb89ff7463425c.jpg

http://www.houzz.com/small-kitchen

Notice how the above counter extends past the the edge of the kitchen onto the adjacent wall.


http://www.bhg.com/kitchen/small/ideas-for-kitchen-spacesavers/?socsrc=bhgpin050912#page=7
When I first read about this one, I remember thinking it was a particularly creative use of space.  The breakfast bar kind of wraps around the dining room wall with cabinets below and shelves above for more storage.


http://dustjacketattic.blogspot.com.au/2013/07/peonies-hot-fudge-ice-cream.html

The same idea is used here in this narrow hallway space.  The breakfast bar turns into counter space above narrow cabinets on an adjoining wall.


http://spicerandbank.blogspot.com/2012/05/first-lucas-and-parrish-chilcoat-when.html

While this appears to be a bar rather than a kitchen, we again see how the counter is wrapped around the adjacent wall.  Only in this example, the counter ends so that a fourth person can face the other three.


If in-kitchen seating is what you are looking for, you can also add counter space with a folding table.

http://www.apartmenttherapy.com/angela-tanias-murphy-table-189673
This fold down table surface normally covers the upper part of the bookshelf and is supported by a door covering the lower half of the shelf.  (Click picture to see more photos.)

http://www.nationaltrustimages.org.uk/image/83010
This table surface also folds down from a hutch.  Love that the toaster can be stored inside for an instant breakfast bar.

http://houseandhome.com/design/sophisticated-eat-kitchen
 And this counter top, while appearing to be fixed in place simply extends from a built-in and has seating at either end. 


http://remainsimple.tumblr.com/post/46825826427

If all that fails, you can also extend your counter across a window that might interfere with lower cabinet installation.

http://media-cache-ak0.pinimg.com/originals/00/85/6b/00856b9a999e2d8ecff1bd2f9c1cd4f9.jpg


Do you lack for counter space or a spot to sit in the kitchen?  If so, would any of these ideas work for you?

I've been mulling them over for the kitchen in my new house and will discuss how they might apply in my next post. 


(click on photos for sources)


Scenes Around the (New) House

$
0
0


Today I am posting little bits of things around the house that make me happy.


Let's start with this scene in our living room.
Because it's been raining all day and the beautiful California sunshine just made an appearance.


This newly reupholstered antique armchair.
Because I finally bit the bullet and decided on a durable neutral navy which I have layered with color and pattern in the from of a throw, pillow, and a table runner. (Yes, a table runner.)


The natural wear and crackling on this black chest that I'm using as a coffee table.
 Because you can't fake patina like that. 


 This tide clock peeking in the dining room window. 
 Because it was a gift from my husband and because even if I can't see the ocean from our house, I always know if the tide is coming or going. 


  These blue and white demitasse cups stacked on the shelf above our espresso machine.
 Because it's nice to finally use these family heirlooms which have been packed away in boxes for the last five years as we moved from rental to rental.


This wall-mounted faucet handle in our kitchen.
Because the the "Hot" label has faded from 90 years of hands turning it on and off.


 This silver platter filled with broken crayons. 
 Because not only is it easy to find a color, it makes the act of coloring extra beautiful.


And finally, this rumpled scene in my girls' room. 
Because I can't get enough of the the sunlight in our house. 


Garden-y Things

$
0
0
Like our house, we have a miniature yard.  And like our house, I think it's good to have a small yard because it not only means we have less to take care of,  I also feel required to think carefully about what I want to include and exclude.

 
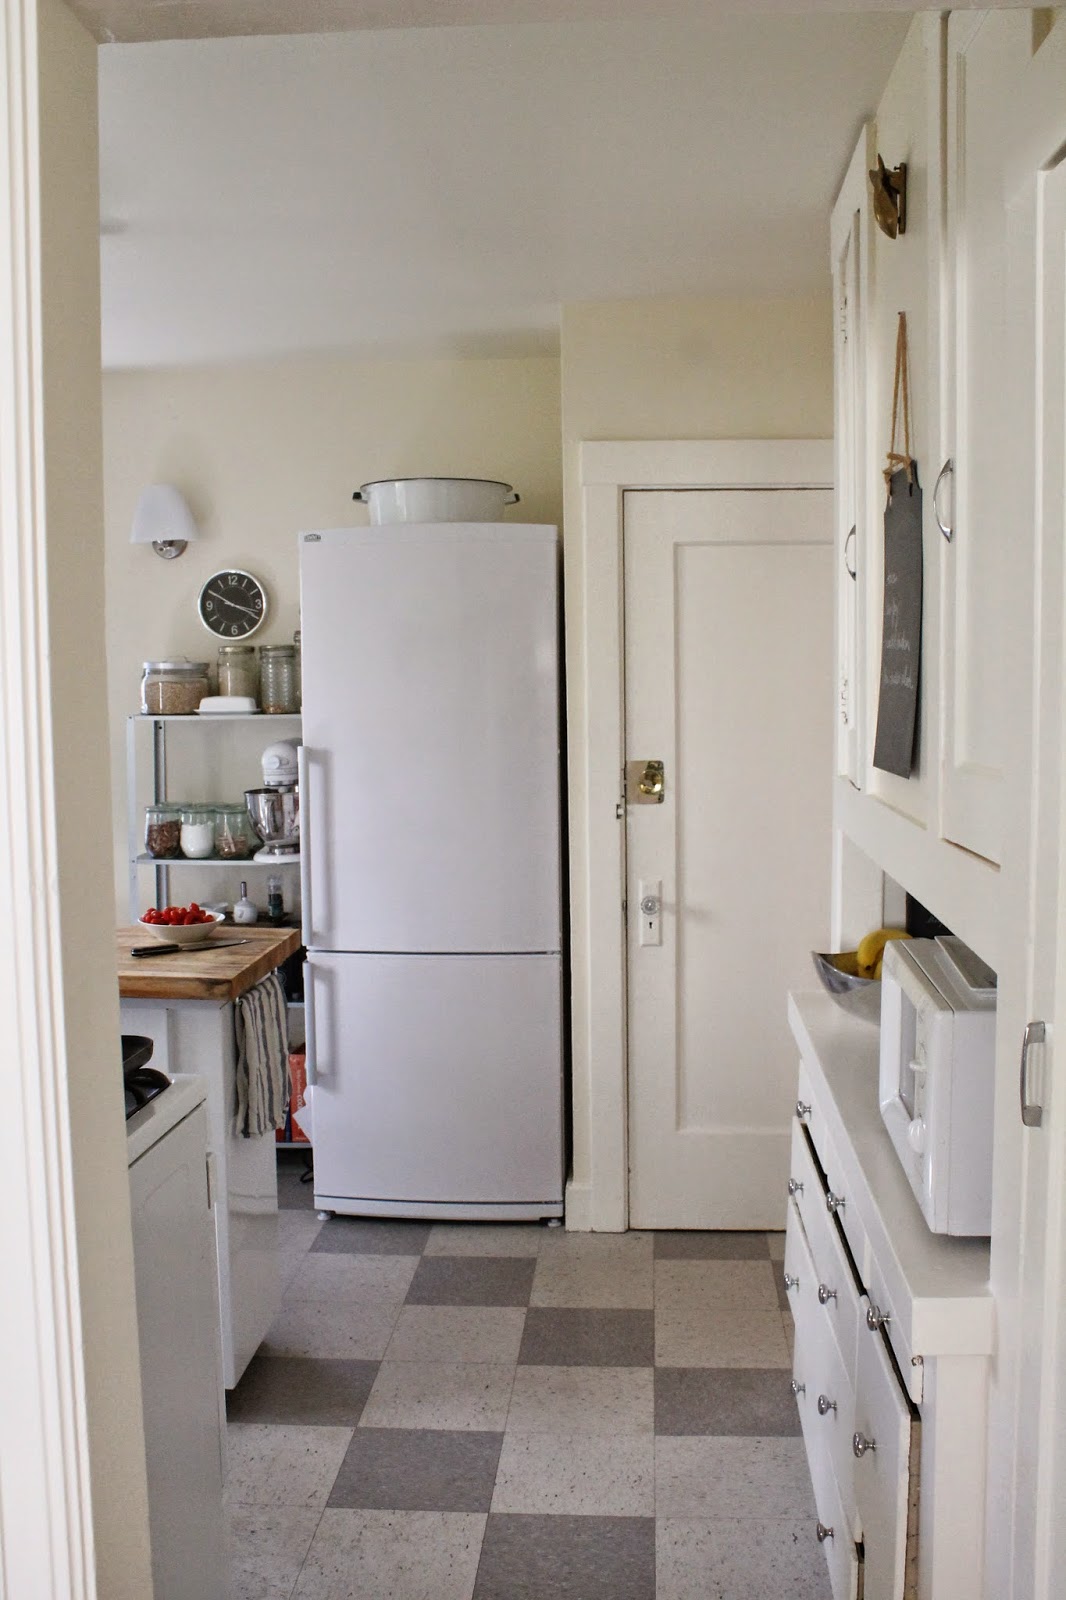
This is the stairwell that leads from the door in our kitchen down to the utility room and garage.  It also leads to the back patio and our small side yard.  The gigantic fern, which is evergreen in the Bay Area, annoyed me when we first moved in. You practically run into it as you go out the back door.  But now I love how this vibrant shade of green greets me as I go down the stairs to do the laundry. 

Now that it is spring, there are always one or two of these new fronds near the center of the fern.  It astonishes me that something so tightly wound, hairy brown thing unfurls itself into such a delicate green frond! 

Also on the back patio are these tiny and delicate baby's tears are growing along the side of the brick steps. With all of our recent rain, they have begun to spread.   The patio is a lush, shady area so I've been researching shade plants to add to some raised planters against the fence..

We put in an offer on our house last October and got the keys in November.  The trees had no leaves and much of the space in the yard had been scraped bare and mulched.  So it's been wonderful to see what was hiding under all that mulch waiting to come out in spring. 
 

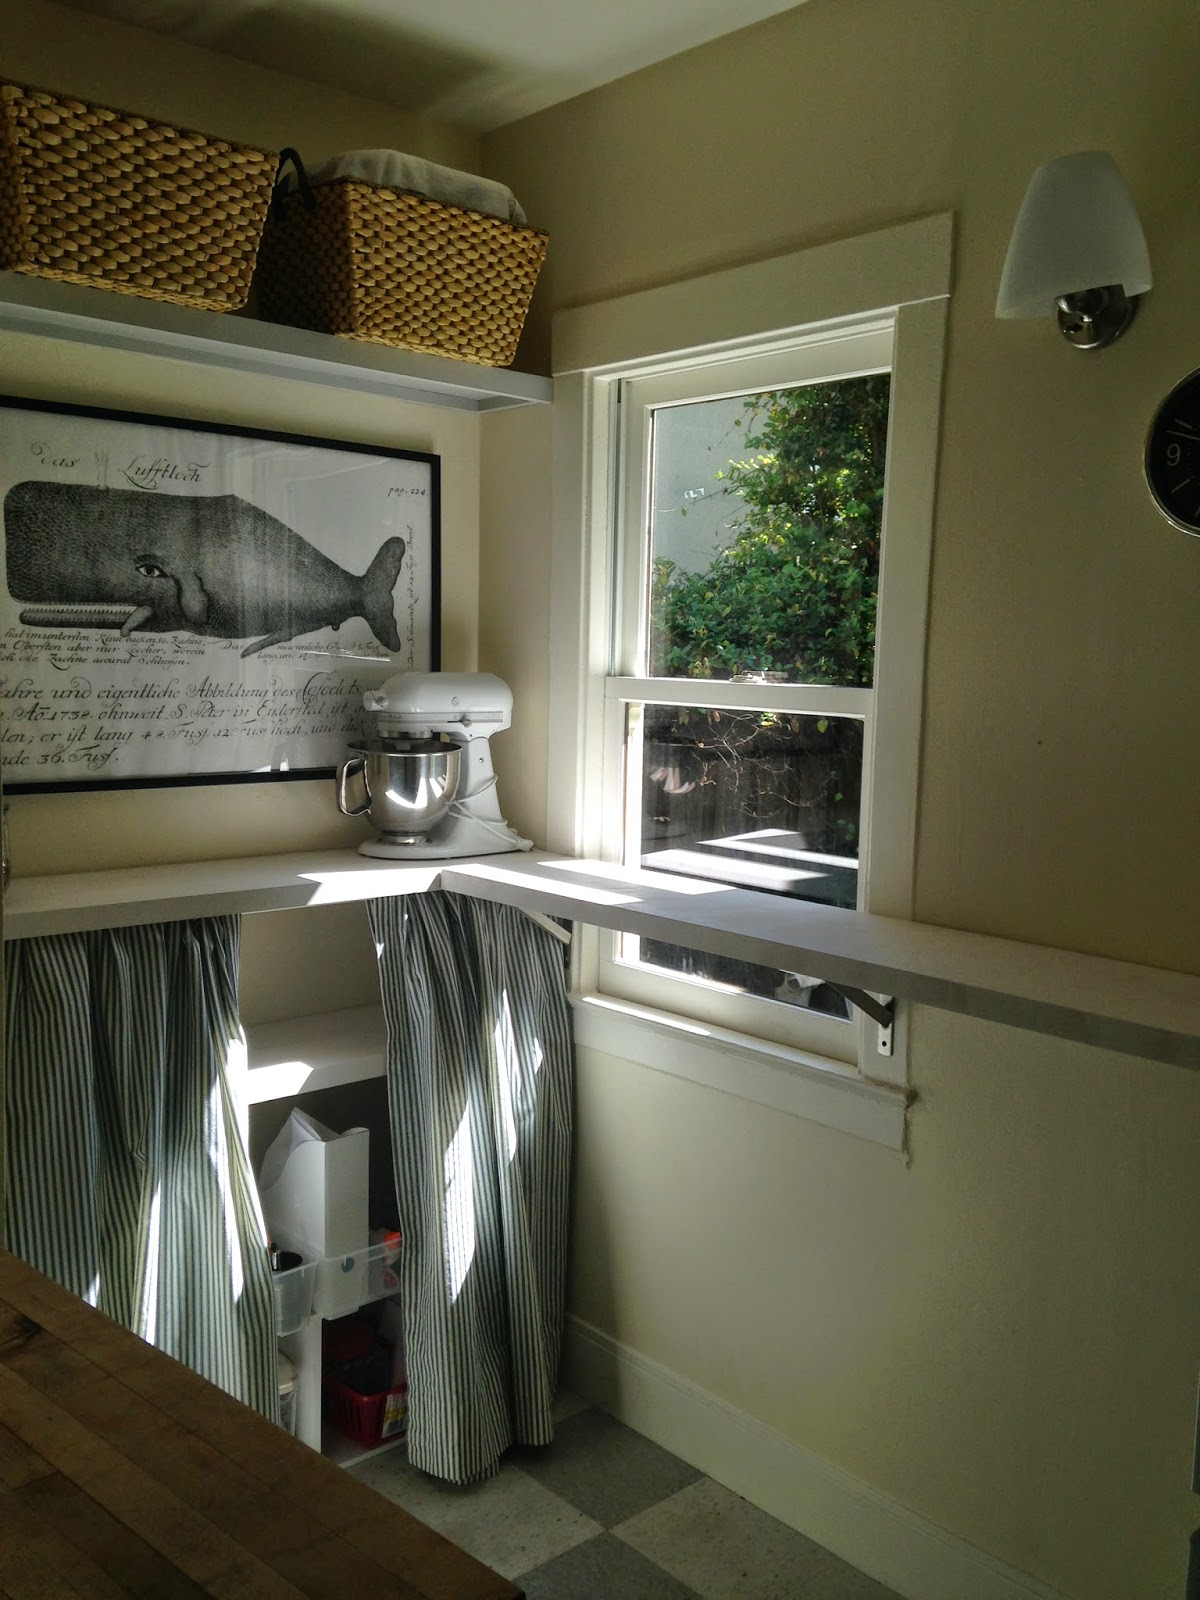
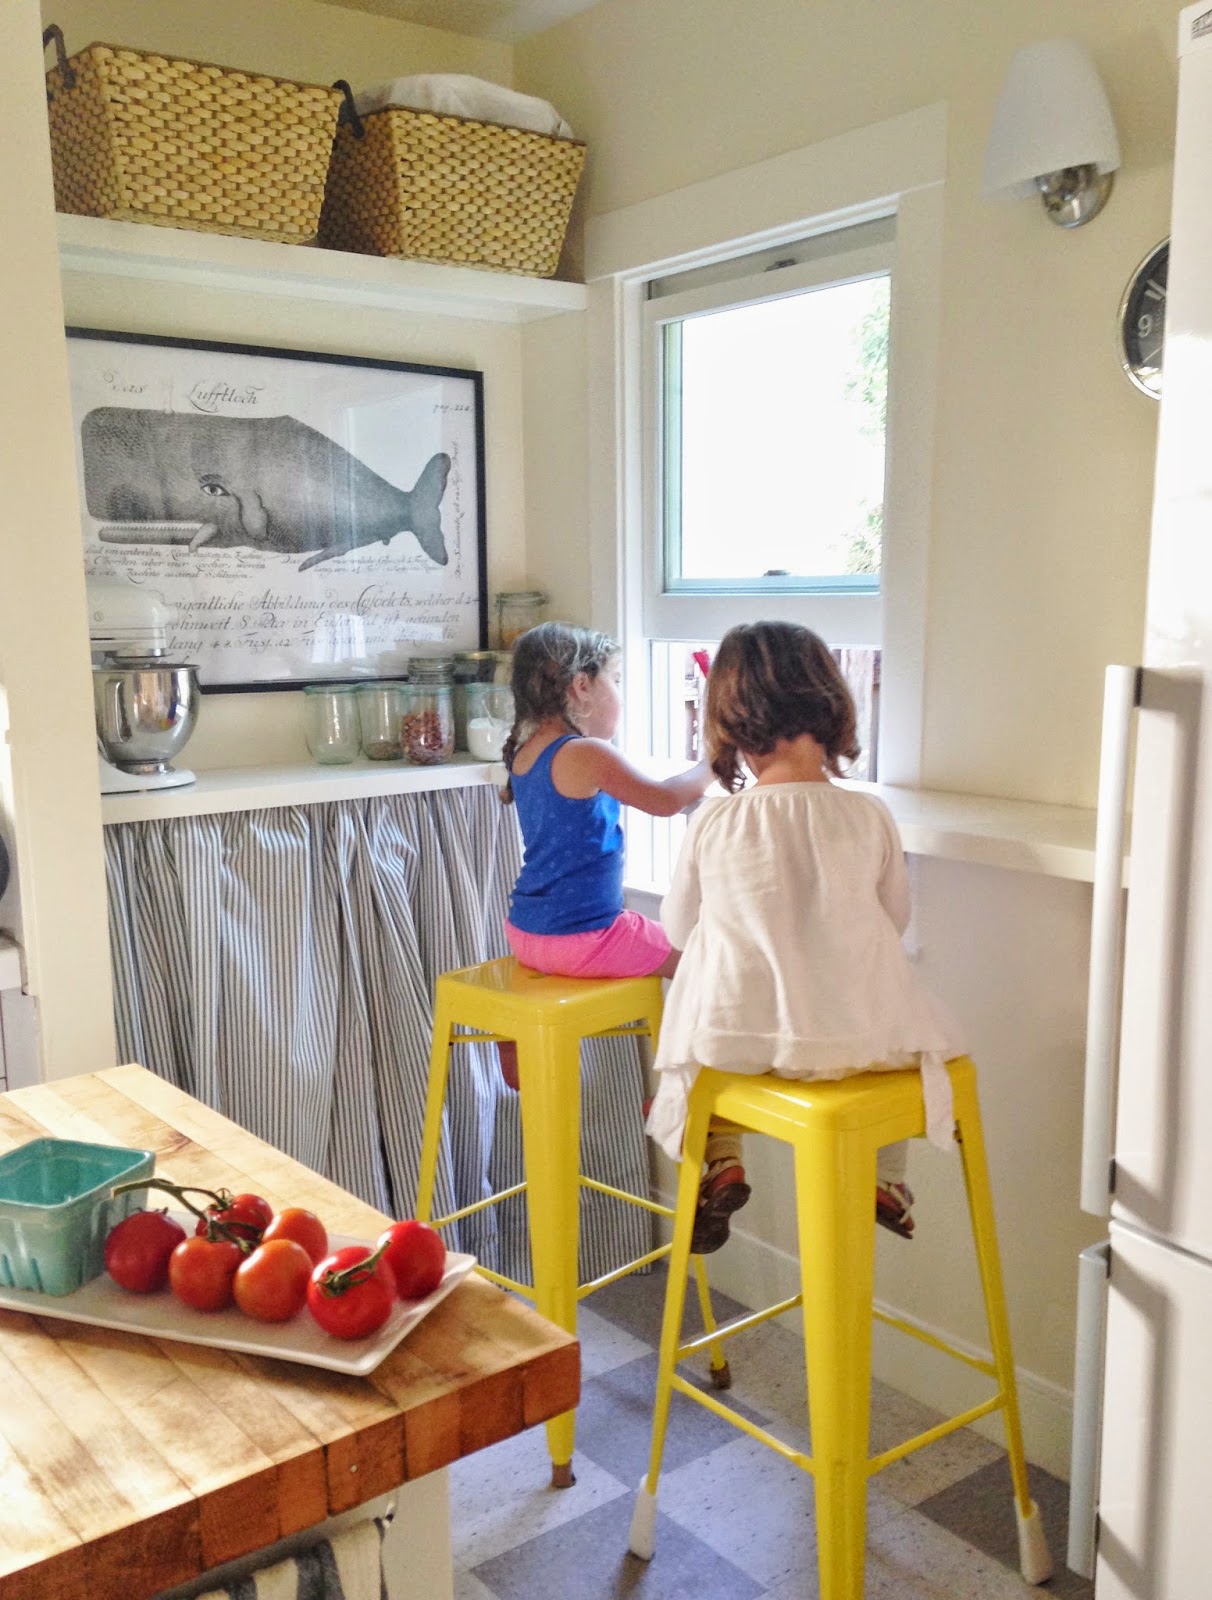
I've been on the edge of my seat watching for the climbing roses outside of the kitchen window to bloom.  They are full of buds just waiting to explode.  This is the first of the bunch to reveal its color to me.

 Also outside the kitchen window and all along the fence is this climbing jasmine vine.  It has been blooming for several weeks and the smell is divine.

There was absolutely no sign of this fern on the side yard when we bought the house.  It has sprung up in the last month.  It now perfectly conceals the hose faucet and the coil of hose below it while still allowing easy access to turn the hose on and off.

We put up this play house, which was a Christmas gift to my girls from their grandparents, shortly after we moved in.  I took this picture in the rain hoping to catch the wren who has made a nest inside the dormer window of the play house.  The baby birds have hatched, and their poor mama is in and out all day long (even in the rain!) bringing worms for them to eat.  First she he flies onto the top of the door, which we have been keeping open for her, and from there she flits into the dormer window.   Each time she does, they make a racket.  They are hoping, I suppose, to catch the attention of the one with the worm. Hard work to be a mama wren.  Seems harder to me than having twins!

In the area beyond the play house, we have begun the work of moving plants, building a small retaining wall with rocks and leveling the ground in order to put in small patch of grass for our girls.  (They want to "run through the sprinklers and do cartwheels!")  The girls love to "help" me with their kid-sized wheel barrow, hoe, and shovel. 

This bougainvillea is what I am most excited about.  I have planted it against a bare patch up wall that goes up two stories.  My dad has agreed to help me build some kind of trellis on his next visit and I can hardly wait to see the bougainvillea climb that high.  I've got my fingers crossed that I can keep it alive until then. 

All of the rain and all of the work in the garden has made for one big muddy mess.  It reminded me of something I've been meaning to show you. 

Attached to my sister's garden gate in New Mexico is this antique copper lavabo.  They were originally used in churches and in houses (especially in France) for washing hands in the days before running water was installed.  My sister's lavabo has a lid at the top.  You can fill it with water and when you are done gardening, you can turn the spout to wash your hands before going inside.  The basin below catches the dirty water and can removed to empty the contents.  Sure beats holding the hose with one hand as you attempt to wash the other!  


Antique French Lavabo, $120 on Etsy

I've been keeping my eye out for a lavabo.  You can find some pretty great ones (white enamel, anyone?) on ebay and etsy.  Unfortunately, they don't come cheap, but I think they make a beautiful and useful accent for a garden. 


What's that color?

$
0
0
http://www.remodelista.com/posts/hotels-lodging-restaurants-the-white-house-in-daylesford-australia

How breathtakingly beautiful is this wall color?


You know what it reminds me of?


A weimeraner.

Our little patch of green.

$
0
0
As mentioned in the previous post, the first thing we did to the small garden on the side of the house was build this play house for our twin girls.


The garden is on a slope, so below the rocks you see in the above photo was a strange patch of mulch.
It invited lots of this:

My girls spent hours digging holes in the the patch of mulch until it ceased to look anything like mulch.  A bog of mud would have been a more appropriate description. 

So I got to work with a shovel.   Here you can see part of the rock terracing below the play house.  I moved a ton of plants within the second tier of rock flower beds, including that newly planted plum tree. 

 After a ton of digging and dirt moving, I leveled out the former patch of mulch and moved all the rocks which had completed the second part of the terrace to make a small rock retaining wall.

 And with my father-in-law's help, we laid new sod.    Large enough for little girls to practice doing cart-wheels.  Long enough for little girls to run through sprinklers.  (Add to the list:  Get rid of the chain link fence!)


  Yay for a DIY patch of green! 

http://media-cache-ak0.pinimg.com/736x/8c/00/dd/8c00ddf0ea2b57c7d89402cf64f4bfbc.jpg

Next up, keep adding to the succulents I've already begun to plant in the rock wall.   The above photo is the goal. 


Dining Room Chair Search

$
0
0


One of the things I love about Pinterest is that it is easy to spot commonalities.  So when we decided to be grown ups and buy a set of matching dining room chairs, I knew just where to look.  All of the above photos are from my dining rooms board.   I think it's pretty safe to say that I like a black Windsor or Windsor-inspired chair with a stained wood table.

We already had the wooden table, but not the Windsor chair.  My search eventually led me to two chairs, both of which I adore:


Above is the Salt chair from Design Within Reach.  I had my heart set on this chair.   I think it's practically perfect.  Simple, classic, well-made.   DWR even let me take it home to test it out overnight, but when we tried it, we found the scale to be quite small.  My husband looked like an adult sitting in a child's chair when he sat in it.  Sadly, I decided to return the chair and continue my search.  Incidentally, this chair comes in a variety of colors and costs a pretty decent $100 each.  I've read that Serena and Lily's Tucker chair ($168 each) is made by the same manufacturer in the Czech Republic.  It also comes in a variety of colors. 


Crate and Barrel's Willa chair (above) has the same clean lines and classic feel.  After sitting in it, the scale felt larger and the chair more substantial.  At $149 a piece, they are more expensive than the Salt chair.  I read a few reviews and one thing that kept popping up was that the paint chipped easily.  When at the Crate and Barrel outlet one day, I spied a few of the chairs and sure enough, every one of them had chipped paint.

About this time, a friend reminded me that I had discovered and liked another Windsor style chair at a different store.  When I went back to try it, I found that it was both comfortable and substantial. 

So I pulled the trigger and here they are in our dining room:


Would you believe me if I told you they are a new design at Ikea?  And that this solid wood chair is a mere $35 a piece?  The name of the chair is Lidingby, and for some reason is not listed on the Ikea website.  I don't know why...testing a new market maybe?

My one bone to pick with the chair is that in typical Ikea fashion, there is a silver screw visible in the cross bar that supports the legs.

Nothing that a little black craft paint can't disguise, however.  In fact, the nailed-on felt tabs I added to the legs of the chair might be more conspicuous!


Regardless, I'm pretty pleased with this purchase.  

Create a Living Outdoor Umbrella

$
0
0
http://www.pinterest.com/pin/206813807862876916/

This photo got me thinking.  I have no idea what kind of trellis is supporting the wisteria vine.  (I think it's wisteria.)

http://media-cache-ec0.pinimg.com/originals/e4/bf/24/e4bf24931fbb7e598b2ac113344b61f1.jpg

But I  you could easily plant a wisteria or other fast growing vine in a large container (or in the ground) and use the frame of an outdoor umbrella -- minus the fabric -- to create a living outdoor umbrella.  Train the vine to climb the center pole and you'd have shade in no time. 

Wisteria will grow in a pot and I've read it can grow up to 10 feet in one year.  To make an umbrella planter stand, click the above picture for directions. 


I plan to keep my eyes peeled for a cast-off outdoor umbrella to repurpose as vine trellis for a bit of summer shade. 


More of the Dining Room

$
0
0


Here are a few more pictures of the dining room that I didn't include in last post. 


Here is built-in sideboard shown in previous posts.  You might recognize that mirror in the niche from the kitchen in our old apartment.  When I first saw this sideboard, I knew it would be the perfect spot to hold the blue and white transferware that had been stored in boxes for five years as we moved from rental to rental.

The transferware was made by Spode in England.  It was given to me because the pattern is called "Camilla."  I've been living without it for so long, that I forget to use it.  Easter would have been the perfect opportunity.


 I have another sideboard in the dining room.  Also a family piece.  It holds most of my dining linens and crafting supplies.  The top of the sideboard is a piece of marble.  I should have taken photos of it, because it's a good example of how marble can stain, chip, and pit over time.  You could either call that damage or patina.  I think I'll call it the latter.  :)

 Across from the wooden sideboard is my girls' play kitchen.  It lives here for want of another spot in our tiny house.  But it turns out to be a great spot since the adults can sit and chat and the kids can make pretend food to serve to us.   Since this photo was taken, I've removed the girl-made pizza parlor sign and put up these wedding photos of the four great-grandparents as seen in the dining room of our previous apartment:

 
That dropleaf table under the photos is what we are currently using as our dining table.  
 I recently removed the top, rotated it 90 degrees on the frame, reattached it, and removed the gatelegs.  
 
You can see how it makes leg room more possible in the after photo.  Guests were constantly kicking the legs, and putting two chairs on that side of the table felt awkward.  I've saved the gatelegs in case I ever want to return the table to a dropleaf.  But this works so much better for now.


 Also since the photo was taken, I've added more white curtains to the bare window.  (No pictures yet.)  I'm undecided about the curtains, as I kind of like seeing the bare windows.  I am thinking more and more about using white roller shades within the frame so that they visually disappear when up. 

Something like this, perhaps:

link
 Do you see the roller shades?

Would that mean removing the curtains from the other window in my dining room?  I'm not sure yet...but I can think of another place to use both sets.


Flaws

$
0
0
I came across this photo in my Pinterest feed not to long ago.  I was drawn to the room mostly because it has lots of contrast.  And white walls.  And my favorite natural fiber rug.  And while the room is beautiful and expertly decorated, it's missing something for me.  It feels too polished, too perfect for my taste.  Technically, it hits all the right notes in terms of balance, contrast, texture, scale, repetition, etc., but I'm not sure I'd feel at home in this room.

In my Pinterest feed, this photo was directly under the first one I showed you.  That juxtaposition really highlighted the difference between the two.  There is still lots of contrast, but the harshness is mellowed by warm midtones of the wooden dresser, which I think makes such a difference.  And there's really not much that's polished here -- the beaten up dresser kind of puts you at ease.  We get a story about the room too, don't we?  This is a boy's room.  One who likes fencing and skateboarding.  I much, much prefer this style of decorating and have noticed that I appreciate this lived in and collected look even more as time passes by.


California Cooler (Not the Drink)

$
0
0


In my post about vintage kitchen, I mentioned our California Cooler and promised to talk more about it.  The California Cooler is the the little door built in to the wall to the left of the sink in the above photo.


Here is a better view.  I am not using the California Cooler for its intended purpose -- a way to keep food cool and fresh in the days before refrigeration.   

A California Cooler is not an old-fashioned icebox as it does not depend on ice to keep perishables cool.  Instead, it makes use of air circulation in California's temperate climate.

If you look at the above photo, you'll see a vent at the top of the cabinet with light coming through.  That vent leads to the outside of the house. There is another vent near the bottom of the cupboard (not pictured in my photo).   The idea is that when the air in the cupboard warms, it rises and escapes through the top vent.  Cooler air is then pulled in through the lower vent to create air circulation, thus keeping perishables fresher for longer. 

California Coolers have been enjoying a resurgence lately.  Here are two photos of remodeled kitchens where the homeowner decided to keep the California Cooler intact.
source
Above:  You can see the dual vents in this California Cooler, where the homeowner keeps fresh fruits, vegetables, and herbs.

source
This is a newly remodeled kitchen also makes use original vents with a new cabinet placed over them.

source

 The key is to have slatted shelves (or wire) which allows the air to move through.  This California Cooler belonged to Trina of In the Fields (formerly A Country Farmhouse).  Her former  farmhouse was in Oregon, but the early technology was being used there too.

You can see that the slatted shelves in my California Cooler have sadly gone missing.

This is not the first place we've lived with a California Cooler.  The first apartment we rented after we got married had one, and I remember being completely perplexed by the slatted shelves in our pantry.  One day in winter, I felt a cold draft after opening the pantry door.  Upon further investigation, I found a piece of painted cardboard covering wire mesh, which in turn covered an outside vent near the top of the pantry. It took me more time than I care to admit to figure out that this was an early refrigeration system.  The cardboard was there for insulation against the no-longer-needed cool air and the wire mesh underneath was to keep critters out.  


source
The majority of the houses in the Berkeley/Oakland area of San Franciso's East Bay were built in the early 20th century, when California Coolers were often included in a home's design.   As a fun (and nosy) game as I'm walking or driving around town, I often look for the sets of stacked vents.  It's interesting to see where the kitchen is placed in any given house.  


There was evidence of a California Cooler in the previous apartment we rented before buying our current house.  The stacked vents can still be seen from the outside, but the cabinets to the right of the sink now cover up what would have been the California Cooler. I often wonder what that older kitchen would have looked like before the 80s kitchen was installed.  (And much later painted by us.)

source


 Some California Coolers were vented to the basement instead of the outside of the house, as is shown in the above pamphlet.  This idea would work better in places where there are hot summers and freezing winters.

I've since done quite a bit of research on the California Cooler, but there's not a ton of information out there. Much of the information I found can be accessed by clicking on the above photos, which will take you to various sites discussing the California Cooler.

Oh, and if you are wondering about the drink...

Here she is in her former 80s era wine cooler glory. 


Kitchen Design Discussion

$
0
0
source

I'd like to point out several interesting design features of this kitchen.  The first is that the sink is not located under the window, as is standard.  Instead, the sink becomes a focal point by placing a round window above it, surrounded by open shelves.  It's hard to say whether that round window is actually a window into an interior room (note the curtains) or whether it is a mirror.   Who knows why the sink was moved away from the window.  Perhaps the view isn't wonderful -- maybe the window looks into a window of a neighboring house.  Or maybe it was easier to create a working triangle using the length, rather than the width of a room.  Definitely food for thought when it comes to kitchen design. 

Repeating image to reduce scrolling.
Also notice the wall mounted faucet.  It is actually mounted on a sort of box sitting on the counter top.  Why would this be?   We also have a wall mounted faucet in our kitchen.  When we had our house inspected before we bought it, the inspector mentioned that wall mounted faucets can be a problem because when they leak, there is no way to know until the leak has done major damage.  Mounting a faucet on a box that juts out from the wall allows access to fittings under the sink, rather than having to tear into the wall to get to pipes.

Repeating image to reduce scrolling.


What else?  I like the wood table mounted to the island not only because it introduces the visual warmth of wood into the kitchen, it also would feel warmer to the touch than stone -- something that would make a difference in the winter during mealtime.

Last, the rounded back Louis XVI chairs offer a bit of repetition in the room as they mirror the shape of the window above the sink. 

Wish I knew where the fridge was located.  If this were your kitchen, where would you put it?

Kitchen Updates

$
0
0
 In my original post about the kitchen, this wall was blank other than the small ledge on which the glasses sit. 

I was going to put up a huge mirror on that wall, but it felt odd to have the glasses sitting there alone.  And since I couldn't remove the ledge without damaging the lath and plaster walls, I decided to run with it and put all of my everyday dishes on this wall.   Because I knew the shelves would protrude over the stove a tad, I felt it would be safest (and cleanest) to stick with stainless steel.  You probably recognize these from Ikea.  

 The porthole mirror is from Ashley'setsy shop.   She recently posted her new listings on Pinterest, and about five minutes later, this mirror was mine!  (I am a sucker for round mirrors.)  You can see the 3M removable hook I used to hang the mirror peaking out from the top.  I find that's a good way to try things out without putting holes in the wall. 

This kitchen is now at risk of becoming theme-y, what with the whale print and one or two other nautical details.  So, I'm making a conscious decision to stop now.  :) 

Have you ever used dry wall screws?  I use them to hang absolutely everything -- the heads don't strip and while nails tend to crack the plaster walls, a drywall screw drives neatly through it without the need to pre-drill holes.  However, I do feel I need to get after those visible black screw heads with a silver paint pen.  And get that mirror properly hung on a drywall screw.... 


Tiny House

Matchbox Photo Craft

$
0
0

Later this summer, our girls will be going on a trip with their grandparents.  We will be separated for eleven days, which is a lot of time when you are 5 years old.  And when you are the mother of two five year olds.  (And especially when you are the grandparents of two five year olds.)

While our girls are super excited about their trip and talk about it endlessly, there is a tiny bit of anxiety at the thought of such a long separation. One girl in particular has been asking if she can take a picture of us with her.  She is worried she will forget what we look like. 


Which reminded me of one of our favorite books.  You can tell we've read it A LOT.


Angel Child, Dragon Child is about a Vietnamese family who immigrate to the United States, but have to leave their mother behind for lack of money for her fare.   Ut is given a gift by her mother -- her picture hidden inside a small matchbox.  It is a way for Ut to remember her mother until she can be brought to the U.S.   I bet you can guess how the book ends. 

But onto to the matchbox photo project...


This was a fun and easy craft to complete with my girls.  Simply cover an empty matchbox in decorative paper using a glue stick.  We took a selfie on my phone for one matchbox and printed out a previously taken photo of their dad for the other box.  My computer has an option to print photos in a "contact sheet" form, which turned out to be the perfect size.  We cut the photos to fit and glued them to the inside of each matchbox.  One of my girls wanted to add ribbon, so we used packaging tape to stick a small pull tab to the inside of one box.

While I don't normally share crafts on this blog, I thought that this was a fun idea to pass along to those of you who have kids going off to camp, to visit family, or even to college this summer.  Come to think of it, a grandmother might love to carry a photo of her grandchildren in her purse as a sort of "brag box." 

When it's time for my girls to leave on their trip, I'll be sure to tuck a little gift inside.  Cash, candy, or maybe a little pebble with a red painted heart on it.


Building a Breakfast Bar

$
0
0
The above photos were taken in our kitchen before we moved in.  You can see that a good third of the space is completely empty -- and some of that had to be filled with the fridge we had not as yet purchased.  Other than the fact that the right window is lower than counter height, I have no idea why that small wall exists.  It's an odd little nook -- not quite big enough for table and chairs.

 You can see the counter-depth fridge we purchased sitting on the far right of the formerly blank wall.  Because I needed more storage in the kitchen, I put a metal shelf next to the fridge as a temporary fix. 

In addition to lack of storage, I also have a very small amount of working counter space.  So, I have resorted to using our portable dishwasher as an island. (Topped with a piece of butcher block and towel bar to hide the hose/cord slot.) This small rectangle is pretty much my sole area for food prep, but frankly, it's just not enough counter space.  

You might remember this post, where I mulled over different options to extend counter space.  There were plenty of options and I think I changed my mind a million times.  I had really tried to resist having anything covering the window in the corner until I saw this photo on Pinterest.  A few days later, I noticed the below at one of my favorite Berkeley breakfast spots:


My girls had just left on a trip with their grandparents, and so I felt the fates had aligned. 

Building a breakfast bar suddenly seemed to be the only solution -- and I had time on my hands to do it.  Not only would I gain more counter space, I'd also have a bit of in-kitchen dining, and a place for guests to sit while I cook.  (Because as we all know, guests like to hang out in the kitchen.) 

So here is the area before I got to work:
Shelves are 1x12 common boards trimmed with 1x2s nailed to the front to give the illusion of thickness.  The breakfast bar rests on stainless steel brackets while the shelves in the nook rest on 1x1s screwed into the sides and back of the nook.
Here is the freshly built and primed (but not yet painted) breakfast bar which extends over the window and wraps around the corner.  I also built-in shelves behind the curtain to store my twins' art supplies and the stuff I had previously stored on the metal shelf next to the fridge. 


Weeks have passed, we are all home from our various vacations, and the paint on the breakfast bar and shelves have had time to cure.  The yellow bar stools arrived today and my girls immediately put them to use.

Forgot to take the packaging off the feet!

I'm feeling pretty proud of myself, despite the fact that the guy at the local home improvement center was dubious I could build anything like this without the help of a man!  But that's a story for another day.  

I'm thrilled to have gained an additional 10 linear feet of counter space AND have a spot for friends to sit AND have a place for my girls to do homework while I cook -- they start kindergarten next week and I'm not feeling very excited about losing both my babies at once.  But that too is a story for another day. 

dot dot dot

$
0
0
http://www.rejuvenation.com/catalog/products/haleigh-wire-dome-pendant-12-in

I think I need these new pendants from Rejuvenation for my dining room


What do you think?


Also, this luddite finally joined Instagram

You can follow me here:


Instagram


 Please excuse lack of punctuation in the form of periods   One of my daughters dumped a glass of water on what will now be the third laptop -- and now the period no longer works (dot dot dot)

Making exterior windows look larger.

$
0
0

I recently pinned the above photo.  Not necessarily because I love the exterior of the house, though it is cute, but because I want to point out what those green shutters on the porch are doing to the overall appearance of the house. 

They are essentially making the windows appear much larger than they really are.  We see this trick using curtains:

Same size window, differently hung curtains.

Here the curtains are hung high and wide to make the window appear larger and the ceiling appear higher.  (My absolute favorite decorating trick!)


Unlike the curtains, the shutters, which typically stop at the sill, are extended down to the porch floor.  The area below the window has been painted the color of the window trim.  What a great way to make those windows look like French doors!  And three times larger than they actually are. 


Board and Batten Siding

$
0
0


I've always been enamored with all things inside the house, so it surprises me that I've been so devoted lately to exteriors.  My Outside board on Pinterest started out as a measly little thing, but has grown to gigantic proportions:  351 pins to date.  Only my kitchen board tops that. 

I really ought to separate it into more specific categories like Gardens, Porches, Architecture, etc.  But until then, I've combed through a huge number of pins for this post.  It's only recently that I've noticed I've been pinning an awful lot of houses with board and batten siding. 

 
 This is a simple facing, but I absolutely love the way it looks.  Especially if painted white and paired with black roofs, trim, lighting, or hardware. 


I see board and batten a lot in Northern California.  Here, the ranch house reigns in the newer (read: post 1940s) communities.   Love it paired with a metal roof, like in this photo of a newly built Sonoma ranch house.   This is architecture done right. 

 Here is a similar look at an inn in Napa Valley. You have to look closely to see the board and batten.


It definitely has a bit of a modern farmhouse feel.  Board and batten looks great paired with gravel.

 Love it here too with the stone base.  (I'm sure there's a name for the band going around the bottom portion of the house, but I can't think of it right now!)

More white board and batten paired with a metal roof.  Raise your hand if you'd like to have this outdoor fireplace.

 Love the board and batten on this little outbuilding. 


 Kelley of The Polished Pebble has white painted board and batten on the exterior of her Southern California house, as seen here in Country Living.

 Another porch. 


 Here is an example of board and batten paired with a shingled roof.


 And another shingled roof.  Board and batten is simple enough, that with traditional black shutters, it still pairs well this rustic table and chairs. 


I absolutely love this board and batten entry with the black door, overhead light, and gravel. 


 Here's another example with a painted black screen door. 


Board and batten siding looks great in other colors too:


black with white trim
dark green with white trim


Even various shades of grey.


So there you have it.   A little taste of my board and batten heaven. :)


click photos for sources


$15 Ikea Shelf

$
0
0

I recently added this $15 Ikea galvanized shelf to this awkward space next the fridge in our kitchen.  I
I've had my eye on them for a while now, and because they've been out-of-stock at our local Ikea, I stopped at another on our way home from vacation and purchased two.  How can you not at that price?

This space used to be a dumping ground for my girls' and my jackets, shoes, etc. And it always looked a mess.

Here's the before and after.


The set of shelves are a lot shorter than I expected them to be.  Thankfully, I had this mirror that I made from a cabinet door which I had removed to make an open shelf look when I painted the kitchen.


The mirror used to reside here in order to bounce light from the window you see in the above pic.


 And even though it did reflect the light, I always felt it was a tad tall for this spot. 

Anyway, I think it looks way better above the set of shelves.  And helps bring the eye up to the cabinets above the fridge. 
And the mirror still reflects light from the laundry room window which is where I was standing as I took the picture.  Now I've got space to store some cookbooks, the mineral water we buy by the case, and I've freed up one cabinet full of pots and pans along with some counter space for my rarely used mixer.   

I quite like this utilitarian set of shelves. 


Here they are styled for an Ikea shot. 

And they keep popping up in other other places too.


They add a nice nice industrial edge, don't you think?  Their one draw back is that they are a tad wobbly and do need to be fixed to the wall.  But at fifteen dollars a pop, I'm not going to complain.


click photos for sources
Viewing all 102 articles
Browse latest View live